Home Automation Project
Let us learn something new today it's called as home automation which is a subgroup of IoT. Most of you might of heard about IoT, if not, IoT it stands for Internet of Things which is here and now in our day and age. It was a long lost dream once upon a time but it's a reality now. We use our smartphones every day to do a lot of things like listening to music , chatting , voice calls etc., but let's take it up a notch to the next level of life and use it to control basic everyday activities.
Like mediocre tasks of controlling our appliances from where we sit. Using this concept you can control literally everything with your fingertips no matter where you are around the world. For us to accomplish that we must first understand what home automation is so let us learn that first.
What is home automation ?
Home automation (also known as domotics) refers to the automatic and electronic control of household features, activity, and appliances. Various control systems are utilized in this residential extension of building automation. It is automation of the home, housework or household activity. Home automation may include centralized control of lighting, HVAC (heating, ventilation and air conditioning), appliances, security locks of gates and doors and other systems, to provide improved convenience, comfort, energy efficiency and security. Home automation for the elderly and disabled can provide increased quality of life for persons who might otherwise require caregivers or institutional care.
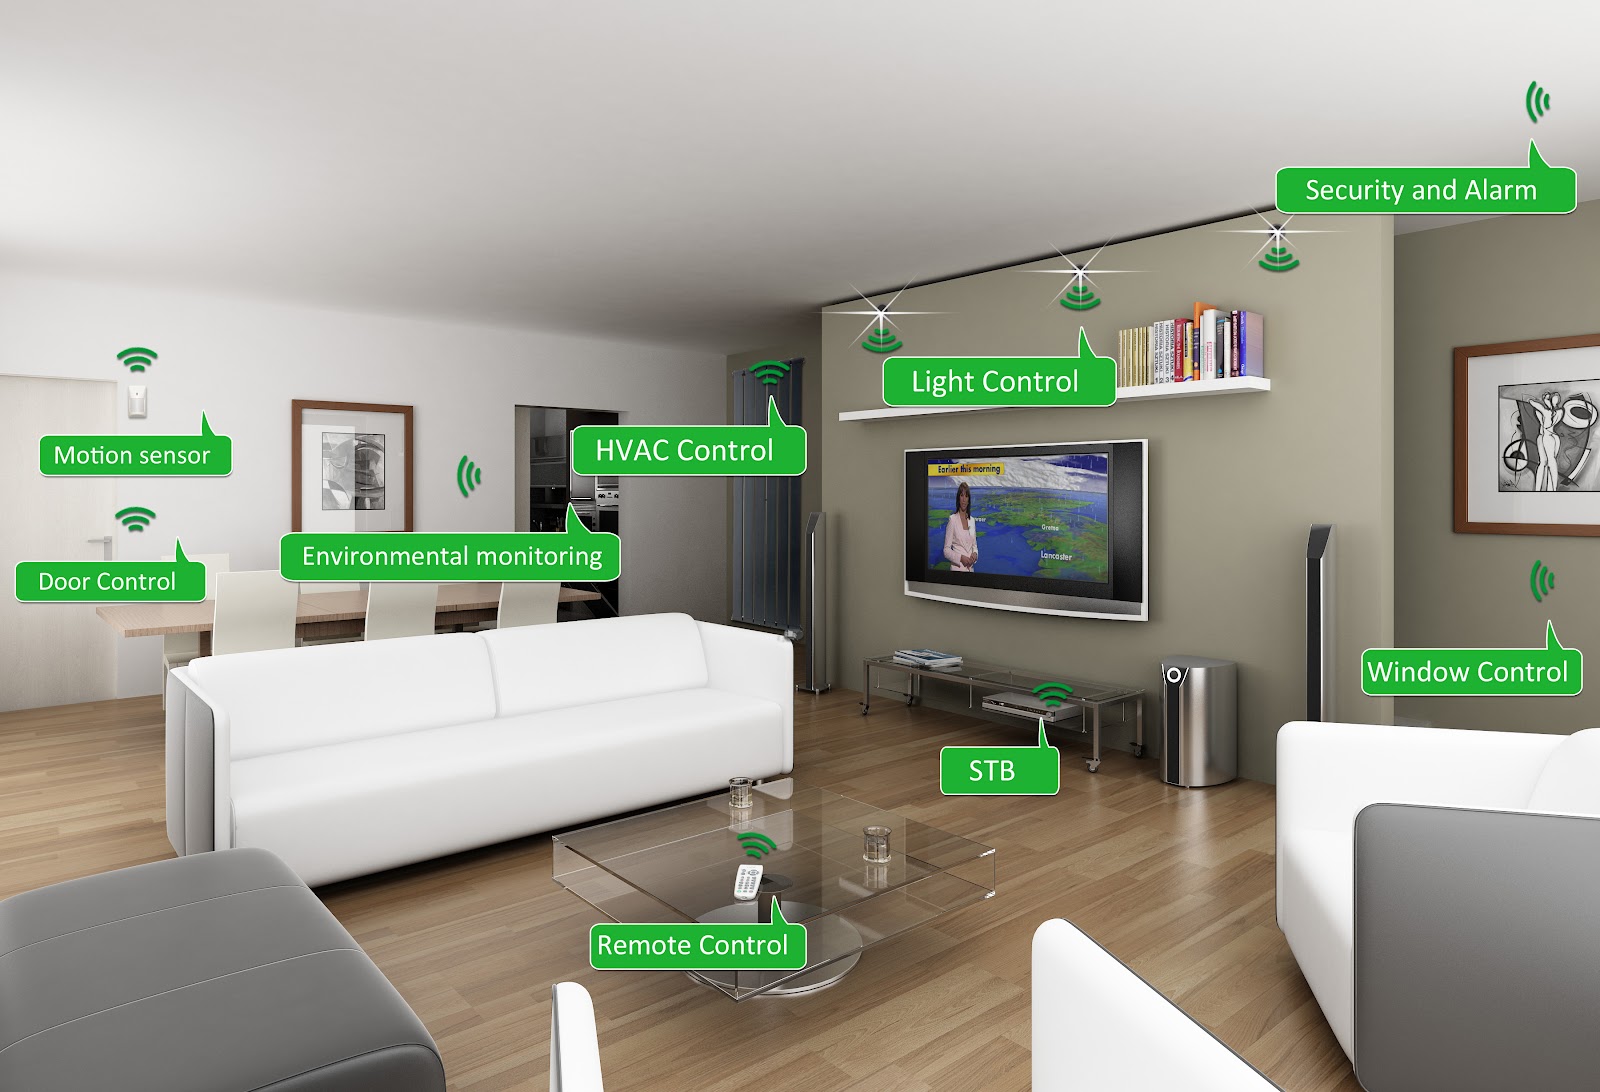
The above image is a smart connected home.
Next let us learn how does home automation work and the things that we need to implement it
.
How does home automation work ?
Home automation may sound difficult but it's actually quite easy and interesting it's actually a dream for the everyday Tech enthusiast who dreams he can be the early adopter for a great venture. But you are reading this to learn its implementation and so here it goes.
Automation is, unsurprisingly, one of the two main characteristics of home automation. Automation refers to the ability to program and schedule events for the devices on the network. The programming may include time-related commands, such as having your lights turn on or off at specific times each day. It can also include non-scheduled events, such as turning on all the lights in your home when your security system alarm is triggered.
Once you start to understand the possibilities of home automation scheduling, you can come up with any number of useful and creative solutions to make your life better. Is that west-facing window letting in too much light? Plug your motorized blinds into a "smart" outlet and program it to close at noon each day. Do you have someone come by at the same time each day to walk the dog? Program your home automation system to unlock the front door for them, and lock it up again when they're done.
Remote Control
The other main characteristic of cutting-edge home automation is remote monitoring and access. While a limited amount of one-way remote monitoring has been possible for some time, it's only since the rise in smartphones and tablets that we've had the ability to truly connect to our home networks while we're away. With the right home automation system, you can use any Internet-connected device to view and control the system itself and any attached devices.
Monitoring apps can provide a wealth of information about your home, from the status of the current moment to a detailed history of what has happened up to now. You can check your security system's status, whether the lights are on, whether the doors are locked, what the current temperature of your home is and much more. With cameras as part of your home automation system, you can even pull up real-time video feeds and literally see what's going on in your home while you're away.
Even simple notifications can be used to perform many important tasks. You can program your system to send you a text message or email whenever your security system registers a potential problem, from severe weather alerts to motion detector warnings to fire alarms. You can also get notified for more mundane events, such as programming your "smart" front door lock to let you know when your child returns home from school.
The real hands-on control comes in when you start interacting with the home automation system from your remote app. In addition to arming and disarming your security system, you can reprogram the scheduling, lock and unlock doors, reset the thermostat and adjust the lights all from your phone, from anywhere in the world. As manufacturers are creating more and more "smart" devices and appliances all the time, the possibilities for home automation are virtually limitless.
Our Connections
Since connection are the most significant part of any mechanism we are going to take you behind the scenes and show you the secrets of our system. But before we do that let me list out the few components we used to complete our system.
1. Arduino (Uno/other)
2. Bluetooth Module (HC-05/other)
3. Home Appliances and Relays if it takes Line
4. Jumper Wires
5. 9V Battery
6. Suitable Resistors (1kΩ commonly)
7. Android Phone
8.SPP Bluetooth App (ArduDroid/other)
9. Bread board
Now that you know our secret ingredients let us see how it will fit together and work as a system with an unique flavour.
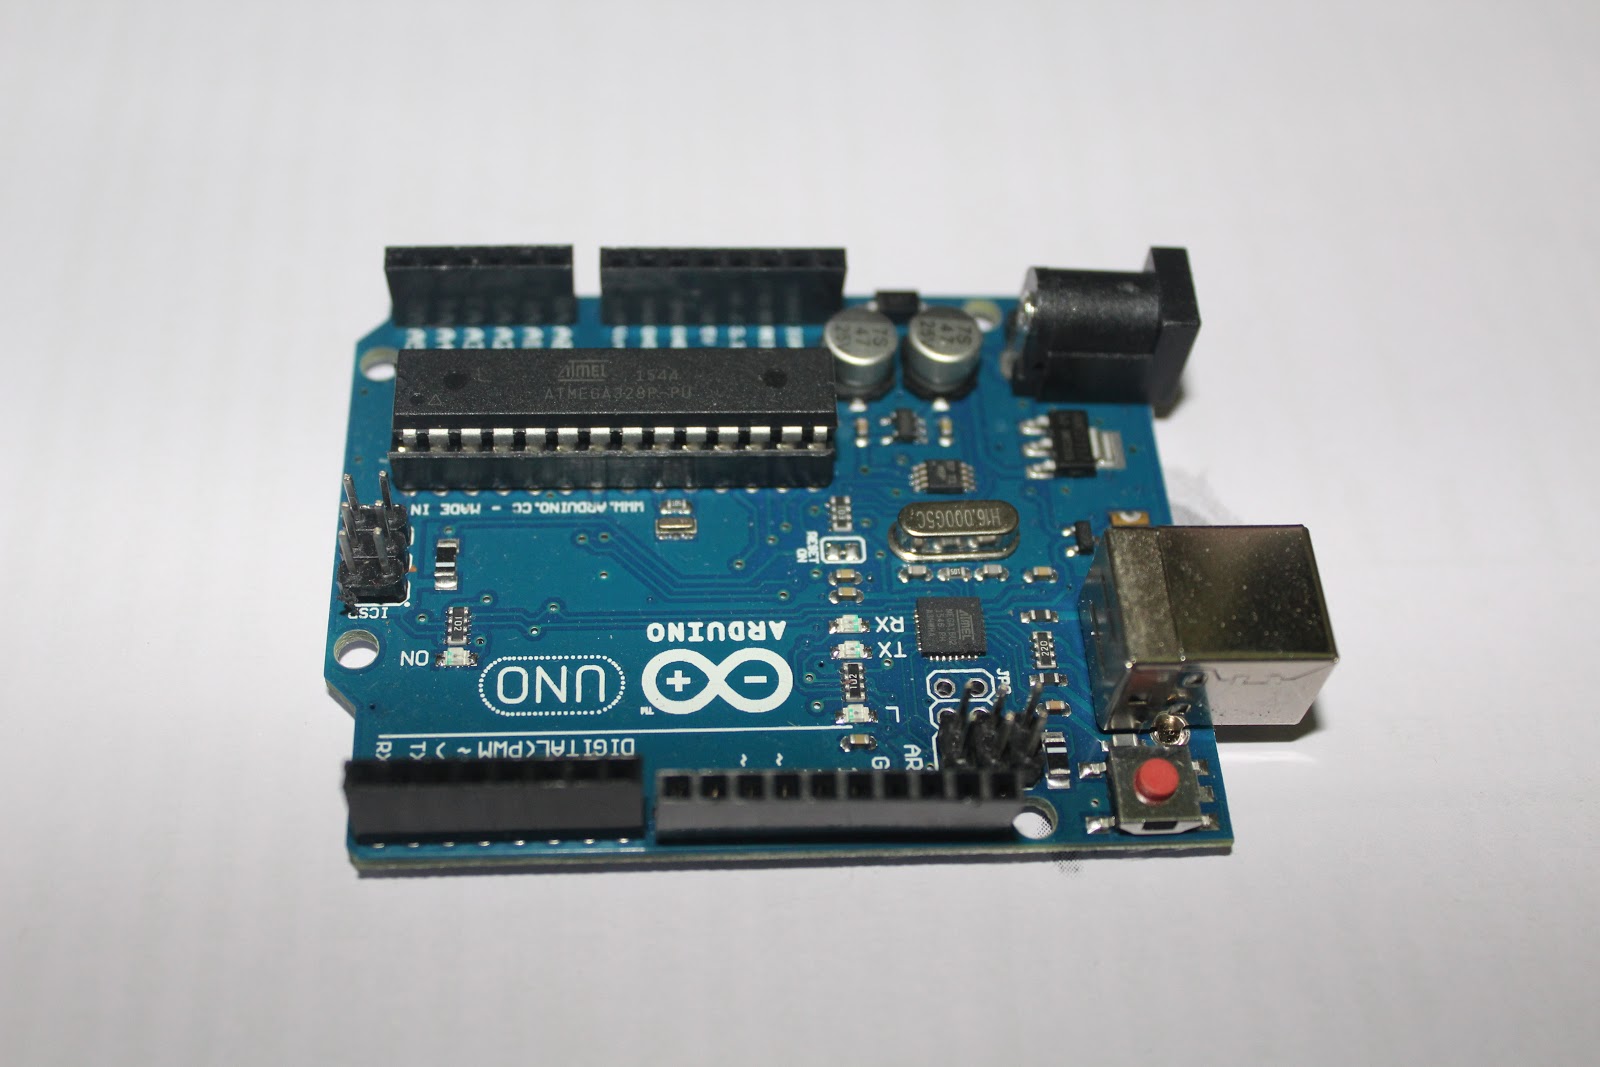
The microcontroller we are using is the brain behind the system it is an free-source component known as Arduino UNO which looks something like this.
The arduino uno is a microcontroller which has a ATmega328P processor clocked at 16MHz Frequency placed within a dimensional size of 2.7in * 2.1 in [68.6mm * 53.3mm]. Its host interface is USB some more details of the controller are that it has 14 digital input/output pins (of which 6 can be used as PWM outputs), 6 analog inputs, a 16MHz quartz crystal, a USB connection, a power jack, an ICSP header and a reset button. It contains everything needed to support the microcontroller; simply connect it to a computer with a USB cable or power it with a AC-to-DC adapter or battery to get started.. You can tinker with your UNO without worrying too much about doing something wrong, worst case scenario you can replace the chip for a few dollars and start over again.
"Uno" means one in Italian and was chosen to mark the release of Arduino Software (IDE) 1.0. The Uno board and version 1.0 of Arduino Software (IDE) were the reference versions of Arduino, now evolved to newer releases. The Uno board is the first in a series of USB Arduino boards, and the reference model for the Arduino platform; for an extensive list of current, past or outdated boards see the Arduino index of boards.
The second most important part being the BT module HC-05. Which looks something like this
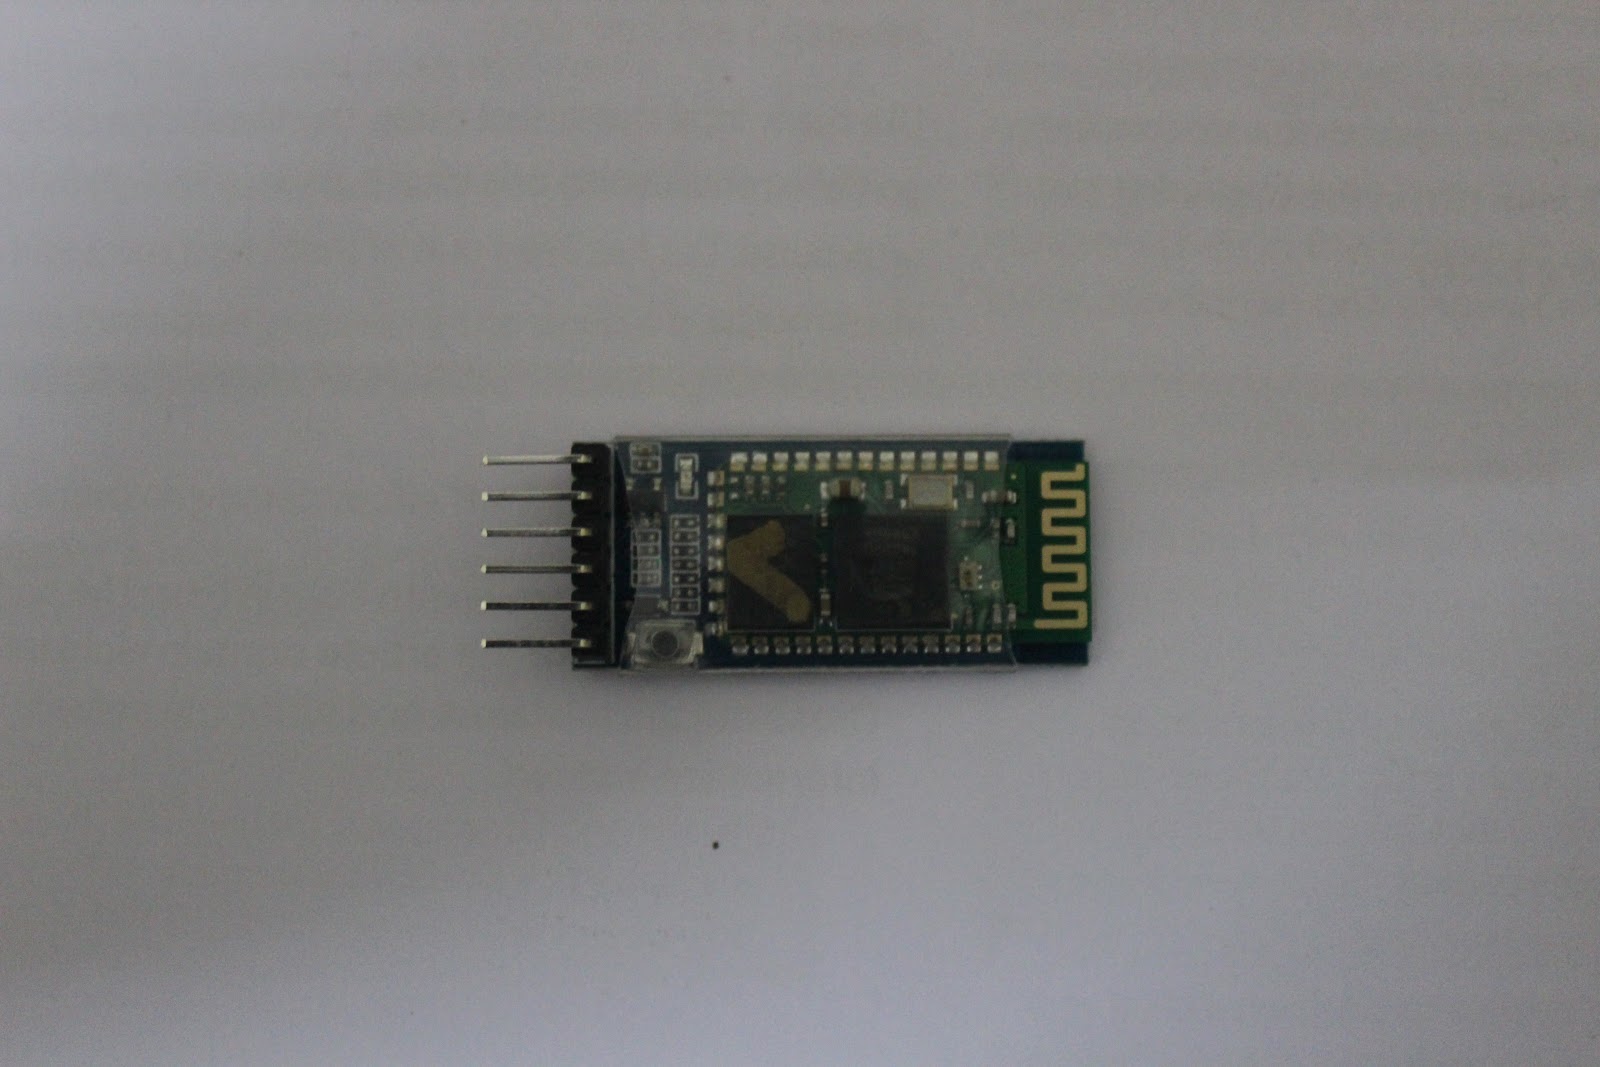
Which is a Master-Slave module which can be configured to work as both master or slave device in the setup. By default, it is configured to Slave Mode which is exactly what we need.
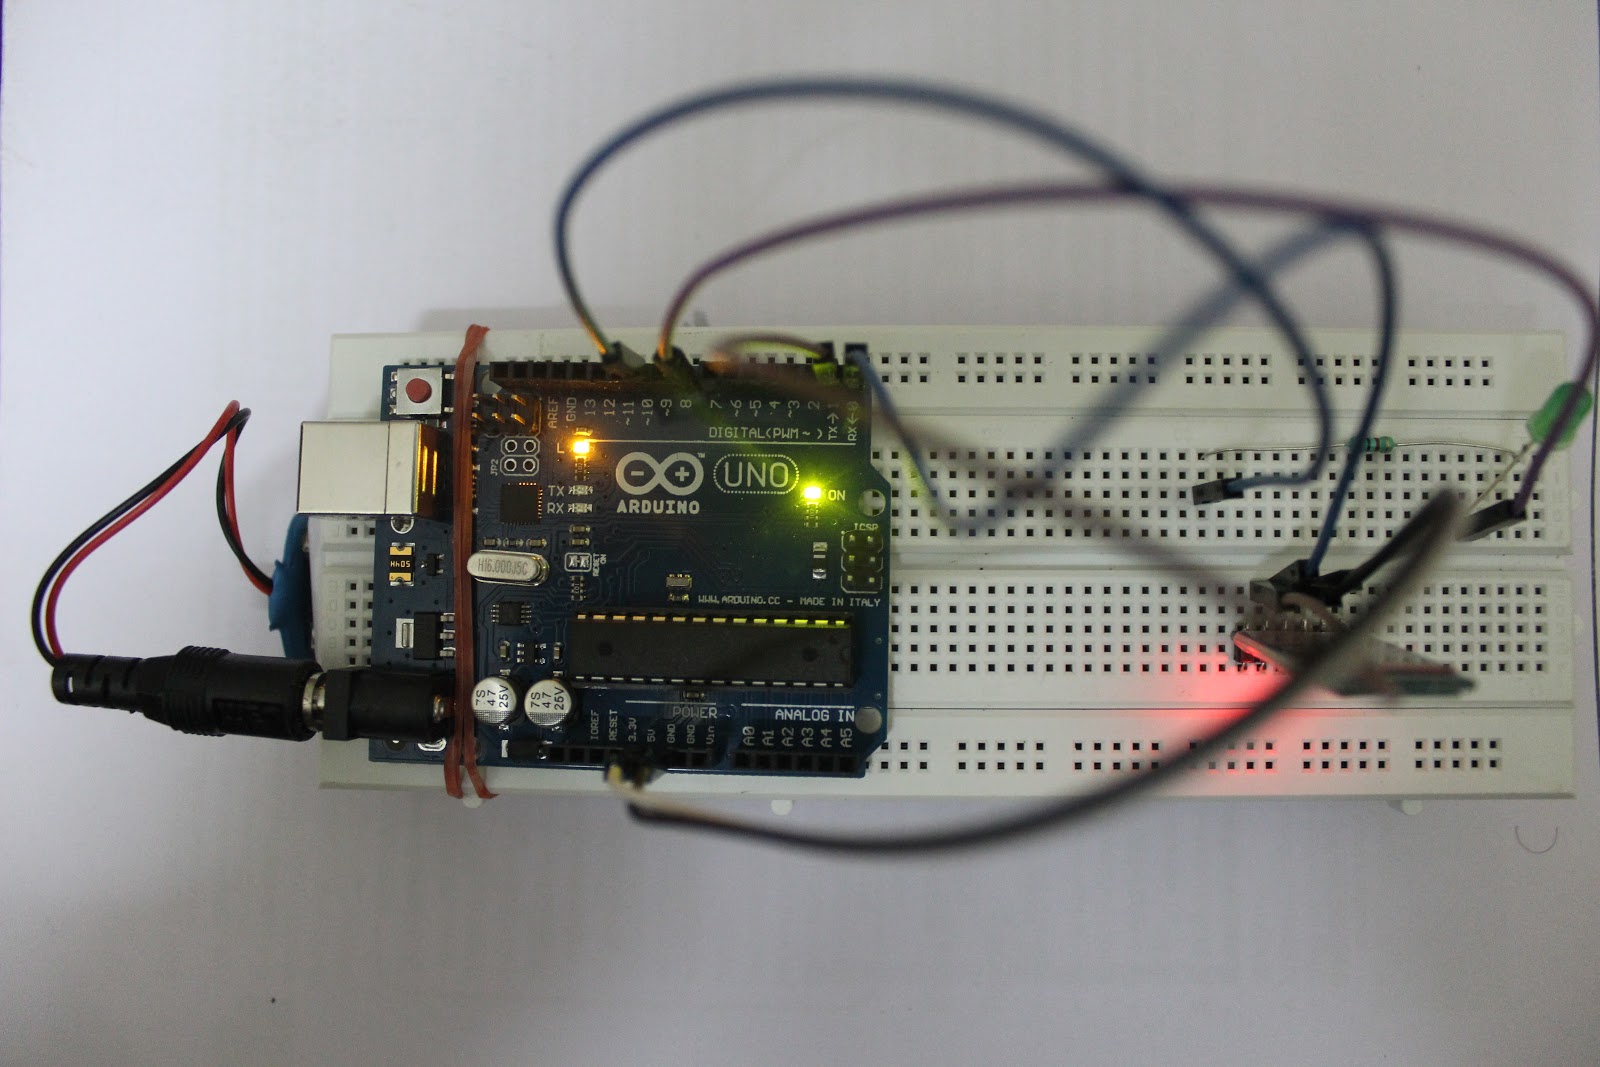
Working
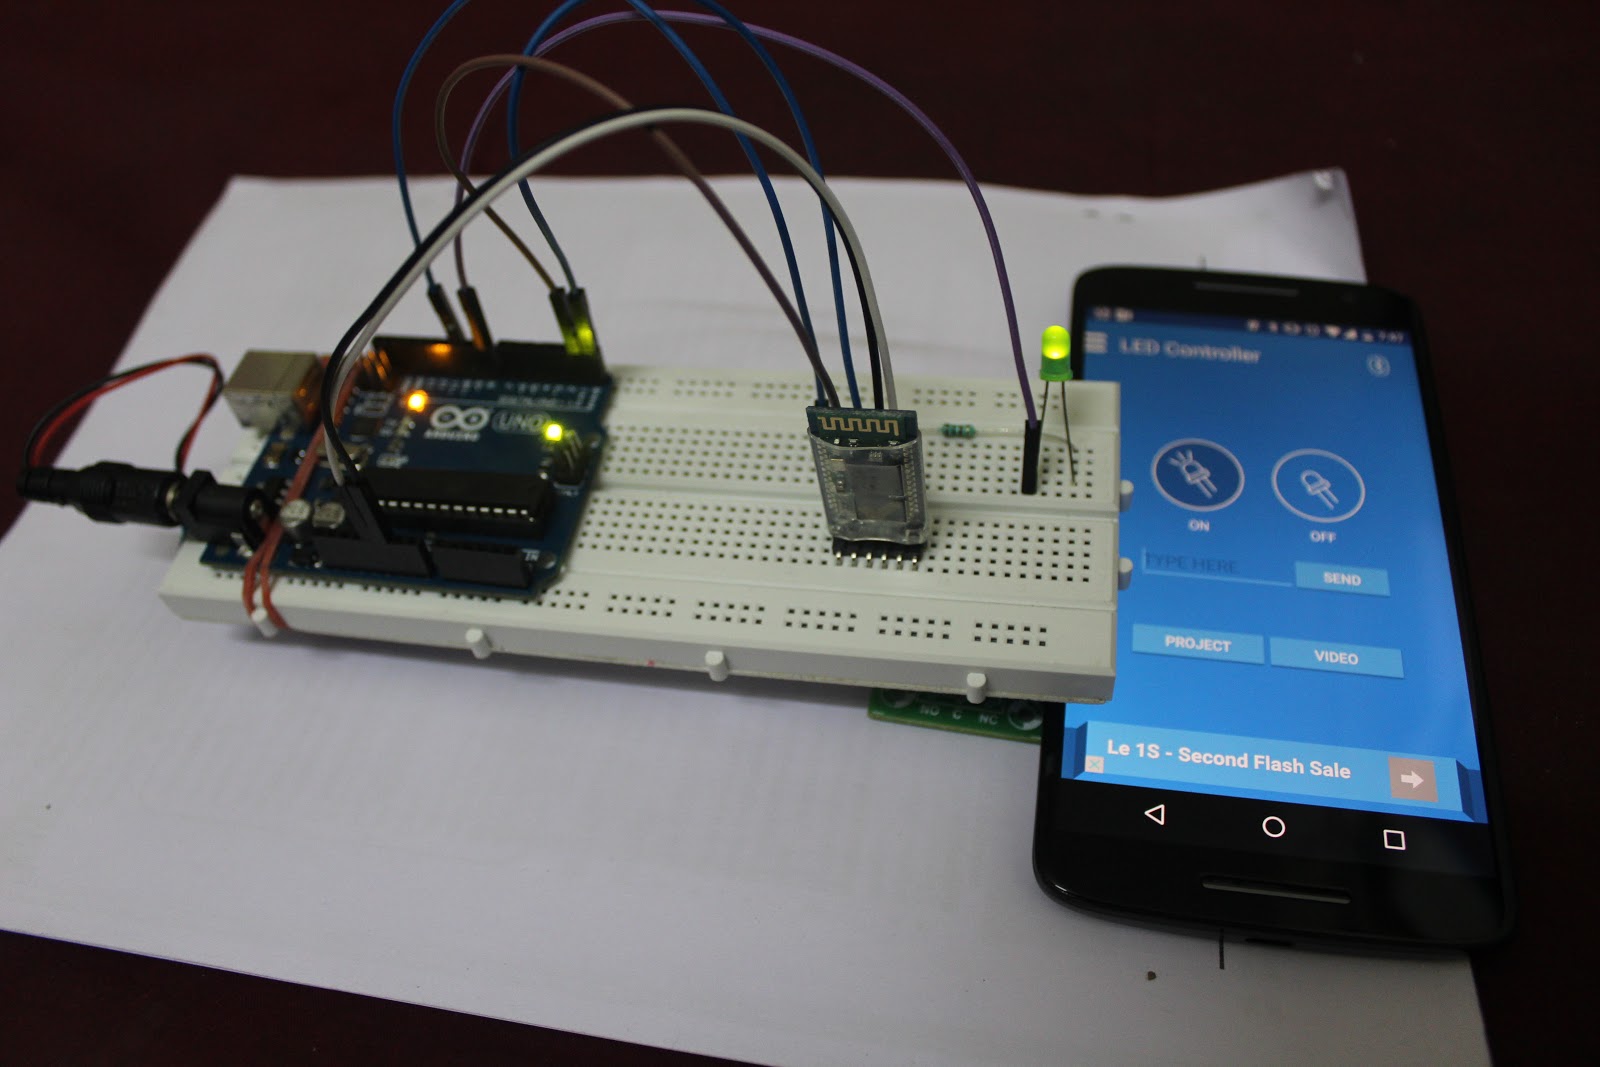
The working of the system is pretty simple and basic actually we first code the microcontroller then we do the necessary connections like in the above prototype then when the power source is applied the BT module turns on as a slave device to which we can be connected to a Master Device which is your android device with default Pairing Pin “1234”.
Now, as you’re connected to HC-05, it should appear in Paired Devices. Now open the SPP Bluetooth App. I prefer ArduDroid as you have full control over all Analog and Digital pins of Arduino if you want to implement this in a large scale like complete Home Automation and even to Send and Get Data as what we are using now. According to our code sketch, the LED glows if HC-05 recieves 1 and stops glowing if it receives 0. So, just type 1 and press Send Data to make LED glow and Send 0 to stop LED.The led will remain on irrespective of the function of the module until it's command is received.
This is the working of the Home Automation Prototype project of ours.
When in ‘ON’ state (Data Sent : 1)
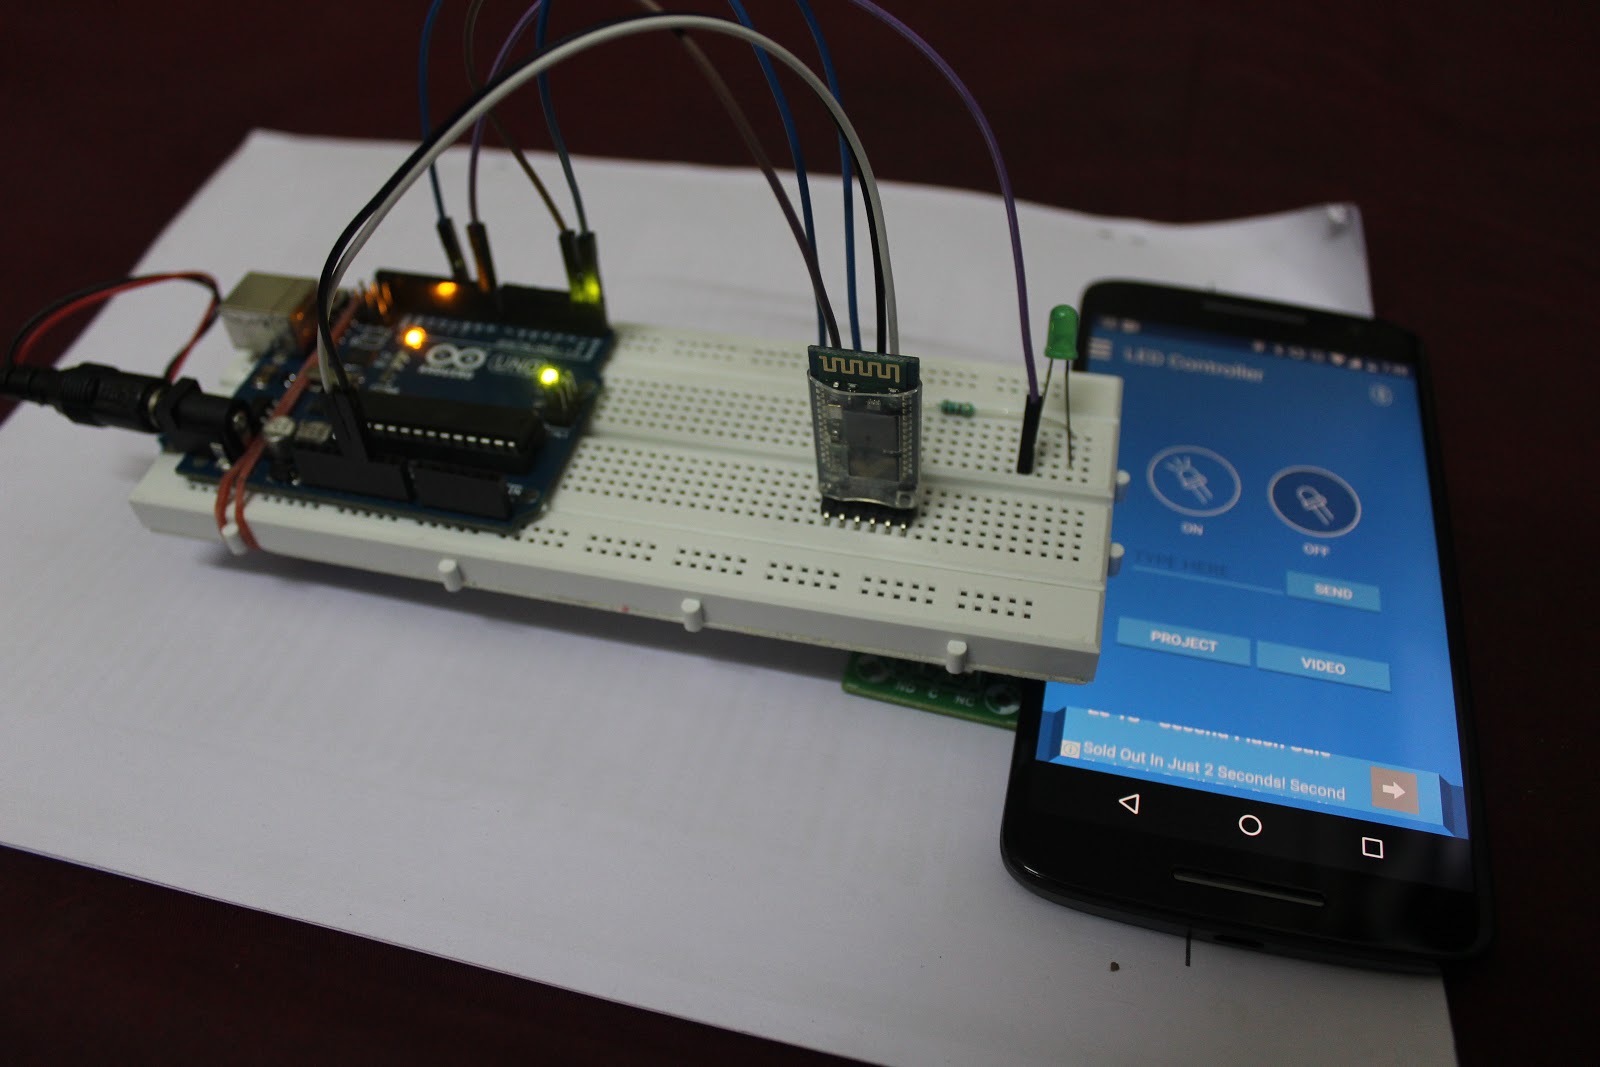
When in ‘OFF’ state (Data Sent: 0)
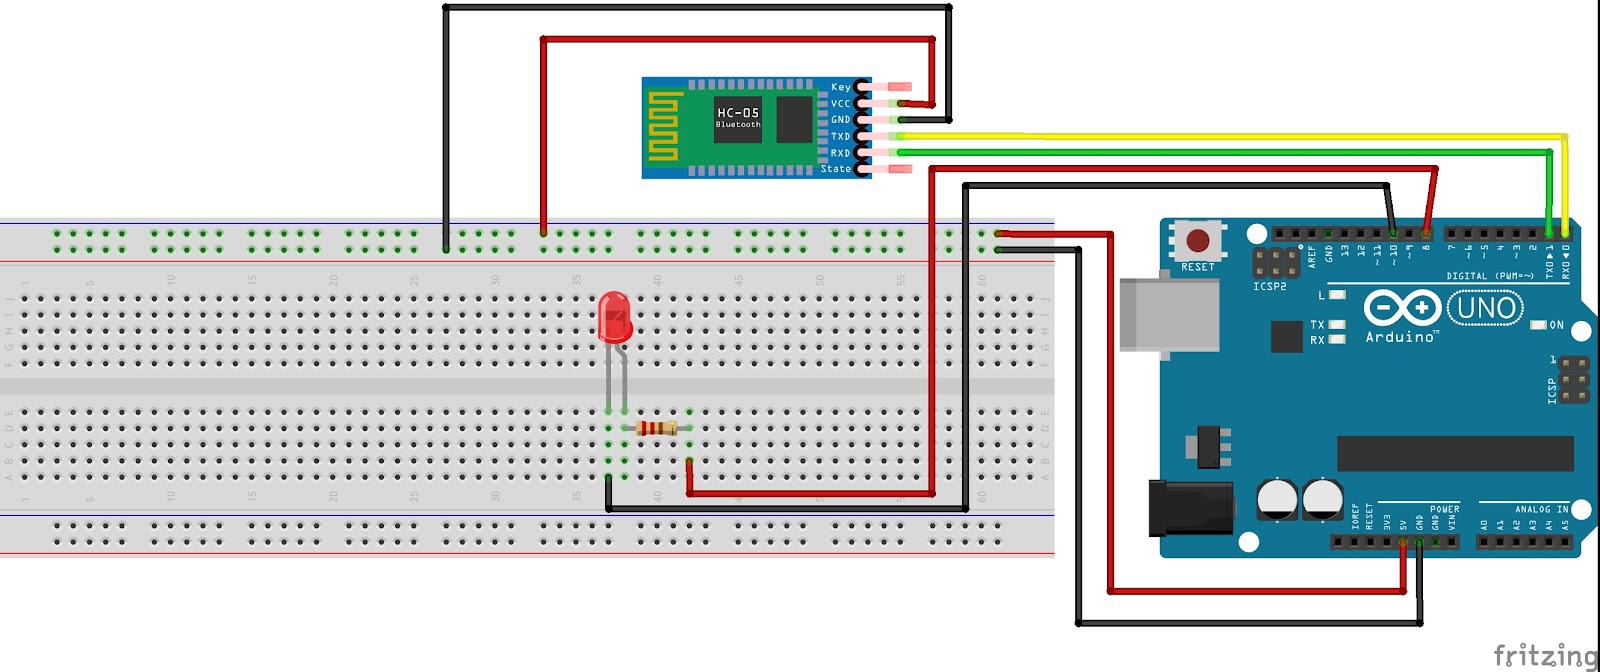
The connections of the prototype is as below.
Conclusion
We would like to conclude that the above project is a complete safe and cost effective implementation of a DIY project for anyone who would like to work on simple modifications at home and implement Home Automation at their own household. Which will take us a step closer to a smarter way of living.
The next version of this Project will be to implement using wifi module so that the system can be controlled from any region with minimum effort and with real life appliances using Relays, thus completing the project.
Notes and References
The material for the above data has be collected and brought together from major directories like google, wikipedia, hackfactory, home automation ,DIY, Instructables, etc.,
We also have posted more information on the project in fritzing (http://fritzing.org/projects/home-automation-with-arduino-and-bluetooth) and you can clarify and clear any problems if you face any.
No comments:
Post a Comment